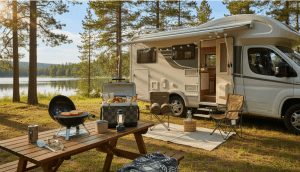

How to Pack a Cooler for a Weekend Camping Trip

Getting your cooler packing right is a passion of mine. It's the key to a stress-free, multi-day trip into the outdoors.
A well-stocked and organized cooler is more than a box for cold drinks. It's your mobile kitchen and pantry. It keeps everything fresh and safe from Friday to Sunday.
We've all faced the common frustrations: a pool of water where solid ice used to be, and sadly, soggy food. But with a smart, strategic method, you can transform that simple insulated box into a reliable food preservation system.
This guide shares the best way to pack a cooler. It's based on my own trial and error and solid expert advice. Follow these steps, and your cooler will become your most trusted piece of camping gear. It will make your next weekend adventure more delicious and organized.
Key Takeaways
- Proper cooler organization is crucial for preserving ice and food quality over multiple days.
- A strategically packed cooler acts as your portable kitchen and pantry, not just a drink holder.
- Using the right method prevents common issues like melted ice and soggy, spoiled food.
- Following a step-by-step plan turns a simple cooler into a reliable preservation system.
- These practical tips, tested through experience, lead to a more enjoyable and stress-free camping trip.
- Your cooler can become one of your most valuable and trusted pieces of camping equipment.
Why Proper Cooler Packing is Your Secret Camping Weapon
Your cooler is more than a box for ice. It's a portable fridge that can make your camping trip amazing. I used to just throw food and ice in, hoping for the best. But that often led to soggy messes by day two.
Now, I see proper cooler packing as key to a great trip. It's the first thing I do to prepare.
Doing it wrong can lead to "cooler soup." This is a mix of warm water and food juices that ruins everything. Your ice melts fast, leaving you scrambling. But doing it right creates a cool, organized space for your food.
This isn't just about keeping things cold. It's about safety too. Food left in the wrong temperature range grows bacteria fast. A strategically packed cooler keeps your food safe for days, not hours.
Good cooler organization saves you time and money. You don't have to buy ice on the go. And you get to enjoy great meals that fuel your adventure.
Following expert advice on cooler packing for camping is key. On long trips, these tips are essential. They turn a simple task into a skill that enhances your trip.
Think of the benefits:
- Maximized Ice Life: Your ice lasts longer, keeping everything cold.
- Guaranteed Food Safety: You keep your family safe from foodborne illness.
- Superior Meal Quality: Fresh ingredients make every meal a joy.
- Total Peace of Mind: You can enjoy the trip without worrying about your cooler.
Spending time to pack your cooler right is a camping hack. It turns a simple item into the heart of your outdoor kitchen. Let's explore how to do it.
Gathering Your Gear: The Cooler and Supplies Checklist
Getting your cooler and supplies right is key for a great weekend outdoors. It's like setting up your camp kitchen. You need the right cooler and tools inside before you can think about food. Let's look at what you need.
Choosing the Right Cooler for a Weekend Trip
Your first choice is the cooler. You want it to be just right, not too big or too small. A huge cooler is heavy and hard to cool. A tiny one means you have to leave things behind.
For a weekend trip for two to four people, a 40 to 60-quart cooler is perfect. Plan for a 2:1 ratio of ice to food and drinks. This keeps things cold for a long time.
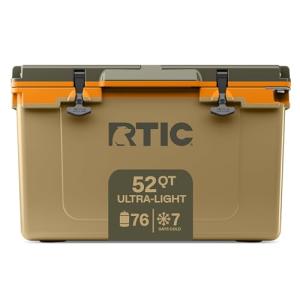
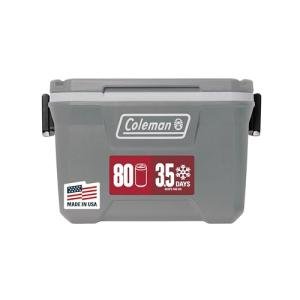
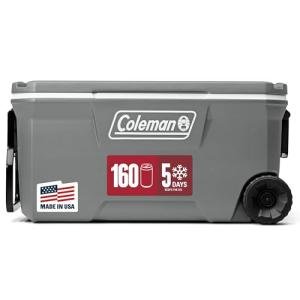
Insulation is crucial. Modern rotomolded coolers keep ice for five days or more. They're an investment, but great for basecamp use.
The debate is between hard-sided and soft-sided coolers for weekend camping. Your choice depends on your style.
| Feature | Hard-Sided Cooler | Soft-Sided Cooler |
|---|---|---|
| Ice Retention | Superior. Best for trips where the cooler stays put at camp. | Good. Ideal for shorter trips or where you carry the cooler often. |
| Durability | Extremely tough. Can be used as a seat or table. | Durable fabric, but can puncture. More flexible. |
| Portability | Heavy, often with wheels. Harder to pack in a crowded car. | Lightweight and easier to squeeze into tight spaces. |
| Best For | Basecamp, car camping, large groups. | Hike-in sites, beach days, picnics, smaller groups. |
Here's a pro tip: use two coolers. One for drinks and another for food. This saves your main cooler from constant opening and closing. It's a game-changer for keeping ice cold.
For a weekend car-camping trip, I choose a high-quality 50-quart hard cooler. The ice retention is great, and I use a separate soft cooler for drinks.
Essential Non-Food Supplies for Cooler Success
Now, let's build your camping cooler essentials toolkit. These items are just as important as the cooler itself.
Your Cold Source: Not all ice is created equal.
- Block Ice: Melts the slowest. Perfect for creating a cold foundation.
- Ice Cubes: Fill gaps quickly but melt faster.
- Frozen Water Bottles/Reusable Packs: My favorite! They act like block ice, and as they melt, you have cold drinking water. No messy meltwater soup.
Use a combination. Start with a block or frozen bottles on the bottom, then use cubes to fill spaces.
Waterproof Containers: This is non-negotiable. Ditch flimsy store packaging. Use sturdy, screw-top containers that create a seal. I repurpose Talenti gelato jars or sturdy plastic containers. They prevent leaks and keep food dry.
Organization Aids:
- Plastic Bins or Heavy-Duty Bags: Use small bins or reusable shopping bags to group meals together (e.g., "Saturday Breakfast"). Grab the whole bag instead of digging.
- A Thermometer: Tuck a small fridge thermometer on top. If it reads above 40°F, you know your food is entering the danger zone.
- A Permanent Marker: Label everything with contents and the date it was packed. It eliminates guesswork.
With the right cooler and this toolkit, you're set up for success. The food comes next, but this gear ensures it stays fresh and safe.
Strategic Food Planning and Preparation
Planning your food for camping makes your cooler organized. It's the first step to a stress-free trip. With a good plan, you'll enjoy the campfire more.
I always plan my cooler before packing. It helps avoid mess and saves time.
Creating Your Weekend Camping Meal Plan
I aim to share ingredients and avoid last-minute prep. For a weekend trip, I plan every meal. This helps me know what to buy and prepare.
Here’s a sample meal plan I often use:
- Friday Dinner: Pre-made burgers (frozen and marinated) with pre-sliced veggies on the side.
- Saturday Breakfast: Scrambled eggs (pre-cracked into a bottle) and pre-cooked bacon.
- Saturday Lunch: Wraps with leftover burger fixings and pre-shredded lettuce.
- Saturday Dinner: Foil-packet fish or pre-marinated chicken with instant rice.
- Sunday Breakfast: Pancakes from a pre-mixed dry blend and pre-cooked sausage.
Notice how the burger veggies also work for lunch wraps. This overlap saves space and reduces items to pack.
After planning, I organize food by day. I use large, labeled bags for each day. This is key for my weekend camping cooler packing checklist. It makes campsite meals easy to access.
The Pre-Trip Prep: Cooking, Portioning, and Marinating
Kitchen prep is where the magic happens. A few hours at home means more relaxation outdoors. My prep day focuses on making campsite cooking easy.
I start with vegetables. I wash, chop, and slice them. Then, I store them in airtight containers. This avoids knives and cutting boards at the campsite.
Condiments waste space. I portion them out into small containers. This saves a lot of space.
For carbs, I pre-cook pasta or rice. I let it cool and store it in a sealed container. At camp, it's quick to reheat over the fire or stove.
Meat prep is a highlight. I marinate chicken, steak, or fish in a sealed bag before leaving. Then, I freeze it solid.
This frozen meat serves two purposes. It acts as an ice block in your cooler. It's also perfectly marinated and ready to cook when thawed. It ensures a tasty, no-fuss meal at camp.
Other hacks include cracking eggs for scrambled into a sealed bottle. I also transfer liquids from bulky cartons into secure containers.
All this prep saves time and informs cooler packing. Items for later go in first. Items for Friday night go on top. This order starts in your kitchen.
The Critical First Step: Pre-Chilling Everything

Many campers forget to pre-chill their coolers. This is a big mistake. Think of your cooler as a thermos, not a fridge. It keeps cold in, not makes it.
It's all about keeping the cold in, not making it. Starting with a warm cooler is a losing battle. Learning to pre-chill is key to keeping ice longer.
How to Pre-Chill Your Cooler
Give your cooler a cold start. The night before, fill it with ice or ice water. This cools down the walls and insulation.
In the morning, dump out the ice. Your cooler is now cold and ready. You can also store it in a cold place overnight.
Storing it in a cold garage or fridge is also good. This ensures a cold start. Your cooler will then focus on keeping food and drinks cold.
How to Pre-Chill Your Food and Drinks
Make sure everything in the cooler is cold. Adding warm items is like introducing heat. This ruins the cold environment.
Chill all your food and drinks the day before. Freeze meats and drinks for extra cooling power. This keeps everything cold longer.
With everything cold, packing is easy. Just move items from your fridge to the cooler. This is a simple but effective trick.
Mastering the Order: How to Pack a Cooler for a Weekend Camping Trip
Think of your cooler as a layered cake. Each layer has a special job to keep your camping meals fresh. Getting the order right is key to avoiding a mess and keeping food safe. This method is essential for how to pack a cooler for a weekend camping trip successfully.
Follow this step-by-step guide to build a cold, organized space for your food.
The Foundation: Starting with a Block of Ice
Start with a solid, cold base. Place a large block of ice or several frozen water bottles at the bottom of the cooler.
These items melt slowly, creating a "cold sink" that keeps air chilled. This is where your cooler's cooling power starts for the weekend.
Pro tip: Use frozen plastic water bottles. They melt slowly and provide drinking water later.
Layer 1: Packing the Heavy, Dense, and Pre-Frozen Items
Put the items you'll need last on top of the ice. This is your trip's deep freeze.
I pack pre-frozen meat and stews here for my last night's dinner. Since cold air sinks, these items stay frozen longest.
This strategy helps you use cooler space efficiently. You won't have to dig through everything on day one.
Layer 2: Adding Meats, Dairy, and Other Perishables
Now add the more perishable items. This includes refrigerated meats for your first dinner, cheese, yogurt, and eggs.
The goal is to nestle these items into the cold environment. Fill every gap with ice cubes or reusable gel packs.
Eliminating air pockets is crucial. Air lets warmth in. Surrounding each item with ice keeps it at a safe chill.
Layer 3: Topping with Fruits, Veggies, and Ready-to-Eat Items
The top layer is for easy access and delicate items. Place your fruits, vegetables, and pre-made sandwiches or salads here.
I often group these in a small, clear bin or a heavy-duty bag. This protects them from being crushed and from direct contact with ice.
This is your "grab-and-go" zone. Smart cooler organization ideas here, like using containers, make meal retrieval easy.
Weekend Cooler Packing Guide: What Goes Where
| Layer | Item Examples | Trip Timing | Packing Tip |
|---|---|---|---|
| Foundation | Block ice, frozen water bottles, large ice packs | N/A (Cold Source) | Cover the entire bottom evenly. |
| Layer 1 (Bottom) | Pre-frozen steaks, frozen chili, frozen burgers | Last day meals | Pack in waterproof bags to contain thaw juices. |
| Layer 2 (Middle) | Fresh chicken, cheese, eggs, milk, marinated meats | First 36 hours | Fill all gaps with ice cubes to lock in cold. |
| Layer 3 (Top) | Apples, lettuce, bell peppers, sandwiches, condiments | Anytime / Day 1 | Use a small container as a protective "crate." |
Sticking to this order does more than keep food cold. It creates a logical system. You will know exactly where everything is, which simplifies cooking and reduces lid-open time. That is the true mark of a masterfully packed cooler.
Cooler Organization Ideas for Maximum Efficiency

Imagine opening your cooler and finding what you need in seconds. This is thanks to good internal organization. It turns your cooler into a well-organized camp kitchen.
Throwing everything in loose is a disaster. Items get soggy, and you waste cold air. The best way to pack a cooler is to plan for what happens after you close the lid.
Using Containers, Bins, and Bags for Separation
My secret is using separate containers inside the cooler. I use sturdy bins, baskets, or reusable bags. They create zones for different foods or meals.
Put Friday's dinner in one bag and Saturday's lunch in another. This makes "meal kits" you can grab easily. Here’s why it's a game-changer:
- Keeps things dry: Containers block meltwater.
- Prevents crushing: Delicate foods stay safe.
- Maximizes cold: You get a whole meal at once, keeping the cooler closed.
These camping cooler organization ideas make your weekend camping cooler checklist easier. You're packing a system, not just food.
Color-Coding and Labeling for Instant Access
Containers solve the physical mess, but labels solve the mental one. When you're hungry, you don't want to guess with opaque tubs.
I always pack a permanent marker and tape. I write the contents and date on the tape. "SAT BREAKFAST - BACON & EGGS" or "CHEESE SNACKS" makes it easy to find.
The Labeling System: Simple and Effective
For groups or complex trips, color-code. Use green for lunch and red for dinner. This visual cue helps everyone at camp.
This is a top cooler packing tip. Labeling eliminates the "what's in this?" mystery. It also ensures food safety.
Combining containers with clear labels is the ultimate best way to pack a cooler for efficiency. A few extra minutes at home save hours of frustration later. Your future self will thank you for these camping cooler organization ideas.
Pro Tips for Maximizing Ice Life and Coolness
To make your cooler work better, focus on two things: the ice you use and keeping warm air out. Learning these cooler packing tips for outdoor trips can turn a soggy mess into cool food for days. I've found that a bit of science is key in the wilderness.
The Ice Types Debate: Blocks, Cubes, or Packs?
Not all ice is the same. Your choice greatly affects how long your cooler stays cold. Here's what I've learned from years of camping.
Block ice lasts the longest because it has less surface area. I always put a block at the bottom of my cooler. Reusable ice packs are a good second choice. They're clean and don't make your food wet, but they're not as cold as real ice.
Ice cubes are good for filling small spaces. Think of them as the mortar for your cooler's cold wall. For the best cooler packing strategies for camping, mix blocks or packs for long-term cold and cubes for gaps.
Frozen water bottles are my favorite. They act as ice and a drink later. For a pro tip, add salt to the water before freezing. Salt lowers the freezing point, making the bottle last longer. Just make sure to mark them so no one gets a salty surprise!
Dry ice is the best for extreme trips. It's very cold and turns into gas instead of melting. Handle it carefully, using gloves, and never seal it in a closed cooler. It's for serious week-long adventures.
Minimizing Air Gaps and Heat Exchange
Air is the enemy of cold. Every empty space in your cooler is a warm spot that melts ice faster. Your goal is to pack everything tightly, like a game of "cooler Tetris."
Use a 2:1 ratio. For every two parts of food and drinks, have one part ice by volume. This keeps everything cool. Pack your heaviest, coldest items first, and fill gaps with ice cubes or crushed ice.
When you're done packing, don't just close the lid. Place a flat "sheet" of ice on top, like a frozen gel pack or a water-filled zip-top bag. You can also use a folded damp towel. This cold seal keeps warm air out when you open the lid.
This method of packing tightly is key for efficient cooler packing tips for outdoor trips. A full cooler stays cold longer than an empty one, even with the same ice.
| Ice Type | Best For | Cold Duration | Key Notes |
|---|---|---|---|
| Block Ice | Foundation & Longevity | Longest | Melts slowest; ideal for bottom layer. |
| Ice Cubes | Filling Gaps & Drinks | Shortest | Great as filler; melts quickly. |
| Reusable Packs | No-Mess Cooling | Medium | Clean, but less cold than real ice. |
| Frozen Bottles | Dual-Purpose (Ice/Drink) | Long | Add salt to water for extended freeze. |
| Dry Ice | Extended Expeditions | Longest | Extreme cold; requires safety precautions. |
Using the right ice and packing your cooler tightly is the best strategy. These best cooler packing strategies for camping help your ice last longer, so you can relax more.
Food Safety Must-Knows for Outdoor Adventures
Ignoring food safety basics can ruin all your hard work in packing your cooler. It's crucial to plan for safety as much as for fun. A bad stomach bug can ruin your trip. Let's make sure your meals are safe and delicious.
Understanding the "Danger Zone"
The "Danger Zone" is a term you should know. It's the temperature range where bacteria grow fast. This range is between 40°F and 140°F. In this zone, germs can double in just 20 minutes.
We pack our coolers to keep food below 40°F. This includes using block ice and chilling food before packing. I always carry a small, waterproof thermometer to check the temperature. It's a must-have for keeping food safe.
Safe Handling Practices at the Campsite
At the campsite, new rules apply. Your habits are key to keeping food safe. Here are my essential practices for safe camping cooler food preparation:
- Seal and Separate Raw Meat: Raw meat goes in a leak-proof container at the bottom of the cooler. This keeps it away from ready-to-eat foods and prevents cross-contamination.
- Use Clean Everything: I use separate cutting boards and utensils for raw and cooked foods. A small bottle of biodegradable soap and a scrubber make cleaning easy. Always wash your hands before handling food.
- Never Let Perishables Lounge: When cooking, only take out what you need. Don't let dairy, meats, or mayo-based salads sit out for hours. If it's out for more than an hour, it's not safe.
Good packing means you can find what you need fast. This keeps the cooler cold and food safe. Planning how you'll get your food is part of expert advice on cooler packing for camping.
The cooler is like a refrigerator for your food. Treat it with care. By knowing the Danger Zone and following safe handling, your trip will be fun and safe.
On-Site Cooler Management During Your Trip
Getting your food cold for camping is just the start. The real challenge is keeping it that way all weekend. Treat your cooler like a partner that needs a good spot and a plan.
Strategic Cooler Placement at Camp
Where you put your cooler is crucial. The wrong spot can melt ice fast. The right spot can keep it cold for days.
Always choose the coolest, shadiest spot you can find. Never leave it in direct sun. Also, don't put it inside your tent, as it traps heat.
For car camping, try placing it under a picnic table or in your vehicle's shadow. This keeps it cool.
Use an old towel to cool your cooler. Soak it in water, then drape it over the cooler. As it dries, it cools the cooler down.
For trips near cold streams, place your cooler in the water. Just make sure it's tied down so it doesn't float away.
Cooler Placement Strategies at Camp
| Placement Method | How-To | Best For | Pro Tip |
|---|---|---|---|
| Deep Shade | Place cooler under dense tree cover or a permanent structure. | All trips, including hot climates. | Watch the sun's movement; shade changes throughout the day. |
| Wet Towel Drape | Soak a light-colored towel, wring it out, and lay it over the cooler. | Dry, breezy days where evaporation is quick. | Re-wet the towel every few hours for best results. |
| Under the Picnic Table | Slide the cooler into the shaded space beneath the table. | Car camping at developed sites. | Use a piece of wood to lift the cooler off the hot ground. |
| In a Cold Stream (Secured) | Place cooler in shallow, moving water. Use a rope or strap to anchor it to a tree. | Backcountry trips near reliable water sources. | Use a waterproof cooler or double-bag items inside as a precaution. |
The "Open Once a Day" Rule and Meal Retrieval
This rule is key for efficient cooler packing for outdoor adventures. Every time you open the cooler, warm air gets in and cold air gets out. I only open my main cooler at mealtimes.
When I do open it, I grab everything I need for that meal at once. This avoids digging in and out repeatedly. Here’s what I grab:
- The main protein (burgers, chicken, etc.)
- All condiments and sauces
- Cheese, butter, or other dairy
- Pre-chopped veggies for cooking
- Any sides stored in the cooler
For lunch, I pull out these items in the cool morning. Then, I transfer them to a small day cooler. This lets me access lunch without touching the main cooler.
On longer trips, some use duct tape to seal the cooler shut. This enforces the "open once" rule. Following these weekend camping cooler packing tips makes your ice last all weekend.
Packing for the Journey Home and Post-Trip Cleanup

The trip home from camping is just as key as the trip there, for your cooler. A bit of effort now avoids a smelly mess later. It also prepares your gear for the next adventure. I see this as the final chapter of my camping story.
It's about respecting the outdoors and myself for the future. A clean, dry cooler is a gift for next time. Let's break down the two-part process: managing the trip's end and restoring your cooler.
Dealing with Meltwater and Waste
First, tackle what's inside. Put leftover food into as few containers as you can. This saves space and makes it easier to organize. Secure all trash and food scraps in heavy-duty, odor-proof bags.
Never leave waste at your campsite. This is a core Leave No Trace principle. Now, for the meltwater. If you used frozen water bottles, you're already ahead.
“Take only pictures, leave only footprints” applies to your cooler, too. Plan to pack out every bit of waste you generate.
Those bottles are now chilled drinking water. You can drink them or pour the water out on non-vegetated ground, far from any water sources. This leaves your cooler surprisingly dry inside.
If you used loose ice, you'll likely have a slushy pool. Have a small container or cup ready to bail it out. Dispose of this wastewater responsibly, away from campsites and streams.
| Item | Action | Pro Tip |
|---|---|---|
| Leftover Perishable Food | Repack into a single, sealed container. Keep it cold for the drive. | Eat these items first when you get home. |
| Trash & Food Scraps | Seal in odor-proof bags. Place in your main trash bag for disposal at home. | Double-bag anything smelly. |
| Meltwater & Ice Slush | Bail or drain using a clean method. Dispose of water responsibly. | Frozen water bottles eliminate this step entirely. |
| Reusable Ice Packs | Wipe dry and place in a separate bag to refreeze at home. | Keep them out of the sun during the drive. |
How to Properly Clean and Dry Your Cooler
Once empty, the real cleanup starts. This isn't a quick rinse. A deep clean prevents mold and funky smells. It's a must for my packing a cooler for camping checklist.
Start by taking it to a well-ventilated area. Use warm, soapy water and a sponge or soft brush. Scrub every interior surface, focusing on corners and crevices where spills hide.
If your cooler has a drain plug, remove it and clean the plug and channel thoroughly. Rinse everything with clean water until all soap is gone. Now comes the most critical step: drying.
Air-dry your cooler completely with the lid wide open. I prop mine in the sun with the lid inverted if possible. Any trapped moisture will lead to mildew. This is the best way to pack cooler for camping next time—starting with a fresh, clean slate.
For stubborn odors, a baking soda paste or a vinegar-water solution works wonders. Just rinse and dry thoroughly afterward. Once bone-dry, store your cooler with the lid slightly ajar to allow air circulation.
Following these steps ensures your cooler remains one of your most reliable camping cooler essentials. A clean cooler is a happy cooler, ready to serve up cold drinks and fresh food on your next weekend escape. It's the perfect closing ritual for a great trip.
Conclusion
Mastering your cooler makes a camping trip special. It's not just about cold drinks. It's about food safety, camp organization, and enjoying the outdoors.
I think the steps we covered really help. Planning and pre-chilling are key. Layering in the cooler keeps things cold longer.
These tips make managing meals easy. You spend less time on food and more on the campfire.
Using these methods for a weekend camping trip improves your experience. You get safer meals and a more relaxed trip.
See your cooler as a tool to be optimized. A well-packed Yeti or Coleman becomes a reliable camp kitchen.
I hope your next trip is filled with delicious, safe food and cold drinks. The outdoors tastes better when your cooler is packed right.
FAQ
What size cooler do I need for a weekend camping trip?
What's the best type of ice to use in a camping cooler?
How can I keep my food from getting soggy in the meltwater?
Should I freeze my meat before putting it in the cooler?
What's the most important step most people forget when packing a cooler?
What order should I pack my cooler in?
How can I organize my cooler so I'm not digging through it at camp?
What is the "Danger Zone" and why does it matter for my cooler?
How can I make my ice last longer once I'm at the campsite?
What's the best way to clean my cooler after the trip?
DISCLAIMER
This document is provided for general information purposes only and should not be relied upon as providing legal advice, technical, or specific operational guidance to the reader, whether as to the practices described in the document or the applicable legal requirements and regulations. bestcampingdeals.com expressly disclaims any responsibility for liability arising from or related to the use or misuse of any information in this document.