Winter Camping Hacks for 2026: Stay Warm, Safe & Prepared Outdoors
You want to camp through snow and cold without turning the trip into a struggle. We’ve pulled together winter camping hacks that keep you warm, dry, and safe, so you spend energy enjoying the trip instead of fighting the elements.
Layer your clothing, use an insulated sleep system, and pick a weatherproof shelter to stay comfortable and avoid common cold-weather fails.

We’ll show you gear choices, shelter tips, food and hydration tricks, and safety steps that actually work when it’s cold. Expect advice you can use on your next trip, whether you’re in a four-season tent, a rooftop setup, or even a winterized hammock.
Key Takeaways
- Pack layered clothing, an insulated sleeping system, and a weatherproof shelter.
- Use food, hydration, and fire hacks to save heat and calories.
- Follow safety and navigation steps to stay prepared and reduce risk.
Essential Winter Camping Hacks
We focus on gear, shelter, layering, and habits that help us stay warm, dry, and mobile in snow and cold. It’s about practical steps and specific items, not just theory.
Why Winter Camping Is Different
Winter camping means you’ve got to manage heat loss, moisture, and terrain that changes under your feet. Cold air pulls heat away fast, so you want insulated sleeping systems and closed-cell foam or inflatable winter pads.
We pick sleeping bags rated for temps below what’s expected, and always add a 15–25°F buffer. Snow changes how you pitch tents. Use deadman anchors, snow stakes, or bury stuff sacks when regular stakes won’t hold.
Ventilation counts: small vents help reduce condensation and prevent frost inside the tent. Cold messes with your body and your gear. Batteries die faster, fuel acts weird, and stiff materials break easier.
We keep spare batteries in inner pockets, carry fuel stabilizers or cold-rated canisters, and check plastics and zippers before heading out.
Must-Know Cold Weather Camping Tips
Layering wins over bulky gear every time. Start with a wicking base, add an insulating midlayer (fleece or synthetic), and finish with a waterproof breathable shell.
Carry a warm hat and insulated gloves. Mittens are better than gloves when it’s really cold.
For sleeping, use an insulated sleeping pad plus a foam pad as backup. A sleeping bag liner adds 5–10°F. Always wear a dry set of clothes to bed, including a hat and clean socks.
Put a hot water bottle in a leak-proof container near your feet for extra warmth. When cooking, use a stove rated for cold, keep fuel warm, and cook inside a windbreak. If you use a campfire, clear snow and build the fire on logs or rocks so embers don’t sink away.
Store food sealed and hang it out of reach of animals.
Common Mistakes to Avoid
Underestimating insulation is the big one. We’ve seen campers bring three-season pads or thin bags and end up cold or worse.
Always check ratings and add padding under hips and shoulders where you lose the most heat. Managing moisture badly ruins warmth fast. Wet clothes, sweat, or melting snow inside the tent drain heat.
Change out of damp layers right away, ventilate your tent, and stash wet gear outside in dry bags. Footwear and hand protection are often ignored. Damp feet freeze fast, so pack spare socks, wear insulated boots, and dry liners at night.
Carry two pairs for your hands—thin liners for dexterity, insulated mittens for warmth.
Choosing the Right Winter Tent and Shelter

We want shelters that handle wind, hold snow, and give us space for gear. We look at fabric strength, pole design, vestibule size, and if there’s an option for a stove or insulated setup.
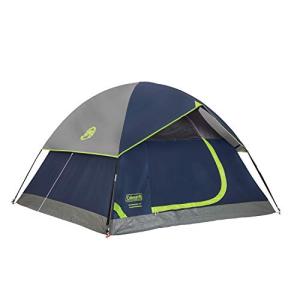
Differences Between 3-Season and 4-Season Tents
Three-season tents are all about ventilation and low weight. They use lots of mesh, lighter nylon, and slim poles. That makes them fine in spring, summer, and fall, but they lose heat fast and buckle under heavy wet snow.
Four-season tents use stronger fabrics, thicker poles, and full-coverage flys. Minimal mesh, extra guy points, and snow skirts all help seal out drafts. Look for high-denier or silicone-coated nylon and poles rated for heavy snow or strong wind.
Hot tents and insulated tents are in between. A hot tent has a stove jack and thicker fabric for heat and sparks. Insulated tents add liners or sewn-in insulation for cold basecamps. We pick based on weather and whether we need a stove jack, heavy snow protection, or to go ultralight.
Selecting the Best Winter Tent
First, match tent weight to your travel style. For ski tours, we like ultralight pyramids or Dyneema shelters.
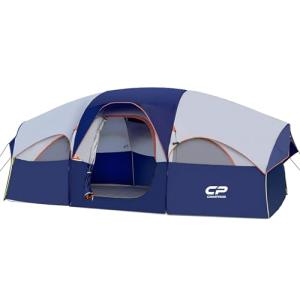
For basecamp or mountaineering, we go for heavier, freestanding four-season tents with strong pole frames. Check vestibule space and storage. Big vestibules (15–25 sq ft) let us stash boots, packs, and a stove out of the snow.
Snow flaps and multiple doors help keep things organized. Ceiling height matters too—a taller tent is nice for changing layers but does catch more wind. Inspect the technical features: stove jack position, heat-resistant fabric for hot tents, reinforced guy-out points, extra guylines, and a bathtub floor with high PU coating for wet snow.
If you’re worried about condensation, double-wall tents with adjustable vents help. Modular options, like removable inners or tarps, add flexibility and protection.
Setting Up for Snow Loads and Wind
Site choice is half the game. We clear a flat bench, pack a snow platform, and avoid wind funnels like saddles.
If melt is likely, dig a shallow trench for drainage. Use packed snow anchors, deadman stakes, or buried bags when you can’t use regular stakes. Pitch tents low and taut with multiple guylines. Spread at least four main guy points and add secondary guys at the mid panels.
Tension fly ridges to shed snow. Knock off heavy snow before it loads up the poles. For pyramids, add cross poles or internal supports to prevent sagging.
For hot tents, seal the stove jack right and run the pipe away from guy lines. Put a non-combustible groundsheet under the stove and keep ventilation open enough to avoid carbon monoxide. We always set up at home first, so we can pitch fast in the cold.
Building a Warm and Reliable Sleep System

We focus on three things: blocking ground heat loss, picking a sleeping bag that fits the weather, and adding liners or accessories for more warmth without extra bulk.
Layering Sleeping Pads for Insulation
We shoot for a combined R-value of at least 6.0 when it’s really cold. Start with a closed-cell foam pad (R ≈ 1.5–2.0) for puncture protection and put an inflatable insulated pad (R ≈ 3.5–5.0) on top.
Together, they usually hit R 6+. Keep total thickness around 3–4 inches to avoid pressure points and keep loft under you. Put the foam pad under the inflatable to stop cold air movement. If you’re worried about condensation, slip a thin vapor barrier between pad and bag.
Secure pads with straps or bivy loops so they don’t move. For ultralight trips, a single high-R winter pad (R 5+) works if you’re okay with a bit more weight. Always test your pad setup at home before heading out into the cold.
Choosing the Best Winter Sleeping Bag
We pick a bag based on temperature rating, insulation, and fit. For most winter nights, get a bag rated at least 10°F below the coldest forecast.
If lows hit 0°F, go for a -10°F bag. Down bags are warm and light, especially high-fill (700–900 fill) with a sewn footbox to stop cold spots. If it’s wet, we add a synthetic outer layer or pick a hybrid bag—synthetic holds warmth better if it gets damp.
Fit matters more than people think: a snug mummy shape holds heat. Check the hood cinch, draft collar, and zipper baffles. If you sleep cold, size up a bit and layer a quilt or liner inside, but don’t compress the down too much.
How to Boost Warmth with Liners and Accessories
Liners add warmth without buying a whole new bag. Fleece liners give 5–10°F; silk or thermal liners add 3–5°F and pack smaller. Toss a fleece liner inside your down bag to bump up comfort and keep sweat off the down.
Down booties and insulated socks keep your feet toasty. Store spare batteries and small electronics inside your bag to keep them charged. Hot water bottles or sealed heat packs at your feet give 2–4 hours of steady warmth.
Other handy stuff: a vapor-barrier liner for really cold, dry trips to keep your pad’s R-value, a balaclava or hood for head warmth, and zippered pockets sewn into the bag for hand warmers. Use loose-fitting layers inside the bag so you don’t cut off circulation or squish the insulation.
Mastering Camp Clothing and Layering Strategies

We focus on moisture control and wind blocking. Fast changes matter, so pick materials that dry quickly, block wind, and let us swap insulation in under a minute.
Base, Mid and Outer Layer Essentials
Base layers move sweat off your skin. On tough hikes, we grab thin synthetic tops and bottoms—they wick and dry fast.
For long stops or sleeping, we like midweight merino tops for comfort and odor control. Cotton? Nope, never.
Mid layers trap air and keep us warm. A synthetic fleece jacket is our go-to most days because it breathes even when damp and dries fast near a stove.
We stash a compressible down or synthetic puffy just for stops and camp. Vests are handy when we want core warmth but need our arms free.
Outer layers keep wind and wet out. We lean toward windproof softshells for breathability while hiking, and grab a taped-seam hardshell when rain or lake spray shows up.
Make sure the shell has pit zips or a full zip so we can vent on climbs without losing coverage.
Choosing and Using Insulated Footwear
Socks come first. We rotate two pairs of wool and add thin synthetic liners on the coldest days to cut friction and keep feet dry.
Always swap into a dry pair before stopping for a while. For boots, we pick insulated winter hikers rated for expected temps.
Look for waterproof membranes, insulated midsoles, and room to wiggle toes—circulation beats a tight fit every time. We pack down pants or insulated overboots for camp to stop heat loss from cold boots.
When snow or ice gets deep, we switch to snow boots or overboots with solid traction. Stash spare footwarmers and a tiny repair kit for soles and laces in an inner pocket—cold hands and fiddly fixes don’t mix.
Critical Accessory Choices for Extreme Cold
Accessories protect our exposed spots: head, hands, neck. We pull on a balaclava under a hood in subzero winds and toss on a wool or synthetic hat for camp warmth.
A neck gaiter or light scarf seals out drafts. Gloves get layered too—a thin liner under a thick glove or mitten keeps dexterity and warmth.
We pack waterproof insulated gloves for wet days and always keep a spare pair inside a jacket pocket. Other essentials: hand and foot warmers, a small camp beanie, and a tough repair kit.
Store electronics and fuel in inner pockets to keep them above freezing. Accessories are mission-critical—lose one, and you’ll notice fast.
Winter Cooking, Food, and Hydration Hacks
We focus on keeping water liquid, picking stoves that work in the cold, and planning meals for quick calories and easy cleanup. Small gear choices and simple routines really save fuel, time, and cold fingers.
Keeping Water and Food from Freezing
We use layers of strategy to keep water and food from freezing. Carry an insulated thermos for hot water, and a soft thermos or vacuum bottle for soups—they keep liquids usable for hours.
At night, stash half-full water bottles inside your sleeping bag or in a dry bag in the tent vestibule to use in the morning. For food, we pack calorie-dense stuff like nut butter, cheese, and cured meats in insulated tote bags.
Drop a hot water bottle or heat pack inside a cooler lined with foam to keep cooked meals warm. Freeze-sensitive items go near the center of our packs or buried in a cooler under clothes.
Label resealable bags and vacuum-seal meals so we don’t fumble with cold fingers.
Choosing and Managing Winter Stoves
We pick stoves based on temps and fuel reliability. Liquid-fuel stoves run strong in the cold and refill easily—they’re our top pick for multi-day trips.
Canister stoves are lighter and faster but lose pressure below about -5 to -10°C. We use an insulating sleeve and keep extra canisters warm in our sleeping bag until needed.
We set up a low windscreen and flat surface to save fuel. Preheat canisters by holding them near your body (not inside down layers) and warm the stove base before lighting.
Carry a small pump or repair kit. For long cooks, stick with a liquid-fuel stove or boil water in short bursts on a canister stove to avoid pressure loss.
Meal Planning and Calorie Strategies
We plan meals for high calories, easy cooking, and minimal dishes. Breakfasts like instant oats with powdered milk and nut butter give quick carbs and fats.
Lunch is all about snacks—cheese, salami, nuts, dense bars—so we don’t have to cook in the cold. Dinners should be one-pot meals: stews, chili, or pasta that reheat well in a thermos or pot.
We pre-cook and vacuum-seal meals at home when we can to save fuel. Aim for 300–500 extra calories per day over normal, and use a hot water bottle to warm sleeping bags and fill a thermos for evening drinks.
Bring a small pan, a spork, and a single-pot system to cut cleanup and keep hands warm.
Critical Safety, Navigation, and Emergency Preparedness
We focus on three things: preventing and treating cold injuries, carrying the right emergency kit, and staying found and connected. Each piece gives us clear actions for winter trips.
Avoiding and Dealing with Hypothermia & Cold Injuries
We watch for early hypothermia signs: shivering, slurred speech, slow breathing, and clumsy moves. Check each other often, especially hands, feet, nose, and ears.
If someone’s in trouble, move them to shelter, get wet clothes off, and layer on dry insulation and a hat. Use a foil blanket or sleeping bag liner to cut heat loss—wrap the head and torso first.
For frostbite, look for numb, hard, pale skin on fingers, toes, or ears. Don’t rub or use hot water. Rewarm only if there’s no risk of refreezing and you can control water temp (around 104°F / 40°C).
Protect thawed tissue from refreezing and get medical help. We stay dry, manage layers to avoid sweating, drink warm fluids, and eat calorie-rich snacks to prevent cold injuries.
Chemical hand warmers and insulated boots help a lot. Rotate tasks and buddy-check the group often.
Emergency Gear and First Aid
We carry a compact first aid kit tailored for winter. Essentials: blister care, trauma supplies (tourniquet, gauze), adhesive bandages, painkillers, antihistamine, wound antiseptic, and a space blanket.
Add blister tape, extra warm socks, and a mini sewing kit for rips. Bring a satellite messenger or personal locator beacon (PLB) with fresh batteries and test it before leaving.
Carry extra batteries or a cold-rated power bank inside your jacket. Include a lightweight stove, spare fuel, and a metal cup for emergency snow melting.
Carbon monoxide is a real risk in tight shelters. Never run propane or gasoline stoves inside tents without good ventilation and a CO detector.
Use sealed canister stoves outside or in vestibules with airflow, and keep fuel away from where you sleep. Make sure everyone knows how to use the first aid kit and emergency devices before heading out.
Navigation and Communication
We plan routes with realistic distances and bailout points. Always carry a map and compass, and know how to use them—don’t trust electronics alone.
Mark waypoints on paper or waterproof notes before you lose cell range. Use a GPS and a satellite messenger for two-way communication and sharing your location.
Keep devices warm and close to your body to save battery. Set up a check-in schedule with someone you trust and file a trip plan with local rangers if you can.
In whiteout or low-visibility, travel slow using handrails like creeks or ridges, and set short turn-around times. If we get lost, stop, build a visible shelter, save energy, light a signal fire or use bright panels, and activate the satellite messenger or PLB.
Must-Have Winter Camping Gear Reviews and Recommendations
We focus on gear that keeps you warm, dry, and moving. Pick items tested for subfreezing use, solid traction, and easy field fixes.
Footwear, Snowshoes and Trekking Poles
We go for insulated, waterproof boots with stiff soles and space for thick socks. Look for rated temps, a Vibram or similar lugged sole, and gaiter-ready cuffs.
Ski boot users should match flex and sole to their skis and bindings. Snowshoes need to fit your weight (including pack) and terrain.
We like aluminum-frame snowshoes with aggressive crampons for mixed snow and crust. For deep powder, bigger decks (25–30 in) float better; for trails, 20–24 in work fine.
Nordic-style bindings are quick and easy to adjust with gloves. Trekking poles help balance and reduce ankle strain—choose adjustable, flick-lock poles with carbide tips or snow baskets.
On ski boot days, go a bit longer. Carry a spare tip or duct tape for field repairs.
Top-Rated Winter Camping Equipment
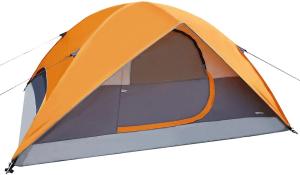
We recommend a four-season tent with a strong pole structure and a full-coverage vestibule for cooking and gear. Look for taped seams and a bathtub floor rated for wet snow.
For sleeping, choose a synthetic or down bag rated at least 10–20°F below your expected low. Pair it with an insulated pad (R-value ≥ 4.5)—inflatable pads plus a closed-cell foam underlay work well.
For stoves, go with liquid-fuel or remote-canister models that work in the cold. We carry fuel testers and a repair kit.
Lighting: high-CRI headlamps and rechargeable lanterns keep you safe after dark. A small kit of extras matters: compact shovel, repair tape, multi-tool, fuel bottle.
We test brands every year—choose gear with proven cold-weather chops, not just the lightest stuff.
Gear Waterproofing and Maintenance
We treat jackets and softgoods with a durable water repellent (DWR) or waterproof spray before the season. Apply to clean, dry fabric and reapply after heavy use.
For sealed seams, check and reseal with tube seam sealer or tape on tents and pads. Boots and gaiters need leather conditioner (for full-grain leather) or synthetic waterproof sprays.
Dry boots between trips to avoid mold and busted insulation. Replace worn lugs or get boots resoled when needed.
Carry field repair supplies: fabric patches, needle and thread, zipper pulls, tape. Clean stove jets and pack a spare o-ring. Regular maintenance keeps our gear working in deep cold and wet snow.
Frequently Asked Questions
We focus on practical gear, safe heating, site choice, and comfort tactics you can use on real trips. The answers list specific items, methods, and safety steps for cold-weather camping.
What are the top-rated winter camping gear essentials for 2026?
We always grab a four-season tent that stands up to high winds and heavy snow. A freestanding, insulated 4-season tent with a low profile and beefy poles usually does the trick.
For sleep, we pick a down or synthetic sleeping bag rated at least 10–20°F below what we expect. That goes with a closed-cell foam pad (R‑value 4–6) and an inflatable insulated pad, aiming for a total R‑value above 8.
We pack layers: merino or synthetic base, a warm mid layer, and a waterproof shell. Insulated gloves, a hat, and solid winter boots are no-brainers.
We toss in a stove that works in the cold, extra fuel, a headlamp with new batteries, a multi-tool, and a first‑aid kit. Microspikes or crampons and trekking poles help out on icy trails.
How can one stay warm when sleeping outdoors in winter conditions?
Insulating the ground comes first. We put a closed‑cell foam pad under an insulated inflatable pad to block heat loss.
Dry, loose layers in the sleeping bag help. A fitted sleeping bag liner adds some warmth and is easy to clean.
We crack a vent to keep condensation down and dry any damp clothes before bed. Tossing a hot water bottle (in a sock) into the bag can keep things cozy for hours.
What innovative techniques are used to make winter camping more comfortable?
We’ll build a snow wall or windbreak to cut down on wind chill. Trenching a shallow perimeter can help keep meltwater away when temps swing.
A reflective heat shield under the sleeping pad—something like Mylar or closed‑cell foam—bounces heat back up. It’s a small hack but makes a noticeable difference.
Chemical hand and foot warmers go inside gloves or boots, and we swap them around to stretch the warmth. Sometimes, we pre-heat air in a bag inside a jacket before stuffing it into the sleeping bag. Not fancy, but it helps.
What should be considered when choosing a winter camping site?
We look for natural wind breaks—dense trees or leeward slopes—but steer clear of heavy, snow-loaded branches. Avalanche paths and cornices? We avoid those, obviously.
Good drainage and a flat spot keep water from pooling under the tent. We check for nearby water that isn’t frozen, or plan to melt snow, and make sure we’ve got some emergency signal if needed.
Sun exposure matters for warmth and charging electronics. We avoid low spots where cold air settles at night.
How can campers safely manage heating sources while winter camping?
We stick to stoves made for outdoor tent use, always with the door open and plenty of airflow. No way do we run canister or liquid fuel stoves inside while sleeping.
Fuel and lighters stay outside the sleeping area, and we stash extra fuel in sealed containers, far from heat. For heaters, we only use models certified for tents and follow the clearance rules.
We bring a battery-powered carbon monoxide alarm and watch for any symptoms. It’s smart to practice with stoves and heaters before heading out into the cold.
What are some great gift ideas for winter camping enthusiasts?
I’d go with a really nice 4‑season sleeping bag liner for starters. It adds warmth, keeps things cleaner, and honestly, it’s so light you’ll barely notice it in your pack.
Insulated sleeping pads are another solid pick. They make cold nights so much more bearable.
I’d also look at a compact liquid‑fuel stove. Those things are reliable when it’s freezing out.
Rechargeable LED headlamps paired with a solar charger? Super useful, especially for longer trips.
Don’t forget about durable hand warmers. They’re small, but they make a difference.
A merino base‑layer set feels like a luxury on cold mornings. And for safety, a compact rescue beacon or satellite messenger is a smart gift, just in case.
DISCLAIMER
This document is provided for general information purposes only and should not be relied upon as providing legal advice, technical, or specific operational guidance to the reader, whether as to the practices described in the document or the applicable legal requirements and regulations. bestcampingdeals.com expressly disclaims any responsibility for liability arising from or related to the use or misuse of any information in this document.