How to Set Up a Camping Tent in Windy Weather: Expert Setup Steps
Setting up a tent when the wind's howling is seriously tough. Your tent fabric flaps everywhere, stakes pop out, and poles try to escape.
But camping in breezy weather doesn't have to leave you with a collapsed shelter or frayed nerves.

The key to setting up a tent in windy weather is choosing a sheltered location, using heavy-duty stakes, securing all guy lines, and positioning your tent's narrow end into the wind.
These steps work together to keep your shelter stable and secure even when gusts pick up.
Most standard tents can handle moderate winds if you take the right precautions during setup.
Wind adds real challenges to your camping trip, but it shouldn't force you to cancel your plans.
Knowing the proper techniques helps you pitch a sturdy shelter and sleep soundly instead of worrying about your tent blowing away.
Key Takeaways
- Choose a sheltered campsite behind natural windbreaks and use heavy-duty stakes with properly tensioned guy lines
- Position your tent with its narrowest side facing into the wind to reduce surface area and wind resistance
- Set up your tent in stages to maintain control and regularly check stability throughout your camping trip
Essential Gear and Preparation
The right equipment makes all the difference between a secure camp and a sleepless night fighting the wind. Wind-resistant tents and backup gear help you stay protected when conditions get rough.
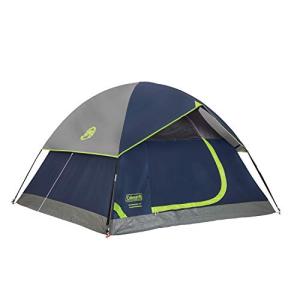
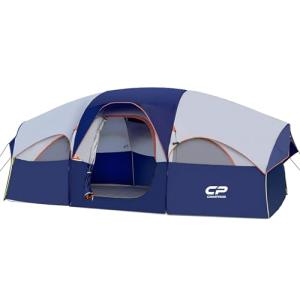
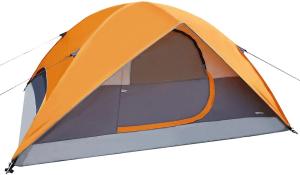
Selecting a Wind-Resistant Tent
A geodesic tent gives you the best shot in high winds. Its multiple crossing poles create a dome shape that spreads out wind pressure.
These tents handle gusts better than single-pole designs. A four-season tent also works well for windy trips.
These models use reinforced poles, stronger fabrics, and sit lower to the ground, which helps cut down on wind resistance. Sure, they're heavier, but it's worth it if you expect winds above 25 mph.
Look for tents with minimal mesh panels and full-coverage rainflies. Mesh can act like a sail and make your tent less stable.
Most 3-season tents handle winds between 15-25 mph when properly secured, but stronger conditions call for beefier designs.
Make sure your tent has multiple guy-out points on the rainfly and body. More attachment points mean better control over the tent’s shape and stability when the wind’s up.
Choosing Proper Tent Stakes and Poles
Standard aluminum tent stakes work in firm soil, but windy weather calls for heavier-duty options. Steel stakes bite deeper and resist bending under tension.
Your stake choice depends a lot on the terrain:
Ground Type and Stake Selection
| Ground Type | Recommended Stake | Length |
|---|---|---|
| Hard soil | Steel or aluminum Y-stakes | 9-12 inches |
| Soft soil | Screw stakes or long V-stakes | 10-14 inches |
| Sand | Sand stakes with wide surface area | 10-12 inches |
| Snow | Snow stakes or deadman anchors | 12+ inches |
Sand stakes have wide blades that grip loose ground better than skinny designs. Snow stakes work the same way, stopping pullout in soft conditions.
Bring spare tent poles or a pole repair sleeve. Wind can snap poles at stress points, and you don't want to be stuck without a way to fix them.
Must-Have Accessories for Windy Conditions
Guy lines take your tent from wobbly to rock-solid. Attach reflective guy lines to every possible point on your rainfly.
Adjustable line tensioners help you tweak tension as the wind changes. Extra rocks or sandbags add weight to tent corners and vestibules—super handy when gusts pick up.
Place them along the base to keep the tent from lifting. A ground tarp or footprint protects your tent floor and adds a bit of wind-blocking weight.
It also keeps moisture from seeping in. Pack a small trowel or camp shovel so you can dig shallow trenches or bury stakes deeper if you need extra holding power.
Preparing a Tent Repair Kit
Your tent repair kit should handle wind-specific damage. Toss in duct tape or special tent repair tape for patching up rips from flapping fabric or flying debris.
Bring spare guy line cord and a few extra line tensioners. Wind wears these out fast, and you’ll want backups if any snap.
Carry a tent pole splint or repair sleeve sized for your poles. Most breaks happen at the joints, and a 4-6 inch sleeve can keep things together long enough for you to finish your trip.
Add extra stakes beyond what your tent came with. Losing or bending stakes is common in wind, so pack at least 4-6 spares in different types to match whatever ground you find.
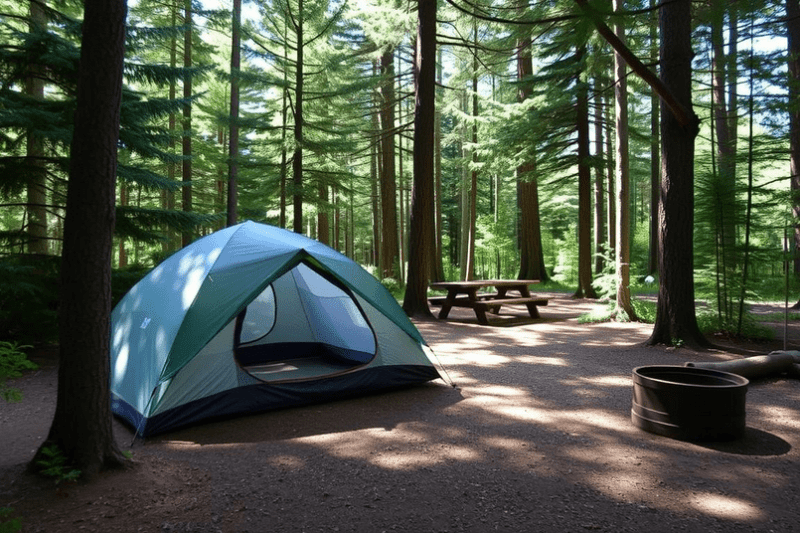
Choosing and Positioning Your Campsite

The spot you pick for your tent can make or break your shelter in the wind. Understanding wind patterns and using natural features for cover goes a long way.
Assessing Wind Speed and Direction
Check wind speed before you set up camp. Winds above 30-40 mph make tent setup dangerous and can snap poles or yank out stakes.
Most standard tents are fine up to 25 mph. Stand still and watch trees and bushes—if small branches bend, it’s probably 15-25 mph.
If whole trees sway, you’re looking at 25-40 mph winds. Figure out wind direction by watching grass, flags, or tossing a few leaves.
Note the main wind direction; it doesn’t usually change much during the day. Stand where you feel gusts hit hardest—wind speeds up through valleys and between rocks.
Finding Natural Windbreaks
Natural windbreaks cut down the wind that hits your tent. Look for big boulders, dense trees, or hillsides blocking the main wind direction.
Set your tent 10-15 feet behind these features. That gives you protection without risking falling branches—definitely avoid camping under dead trees.
Rock formations work better than trees when it’s really windy. They don’t move or drop debris, and small hills or ridges can help if you camp on the sheltered side.
Dense bushes and shrubs block wind at tent level, even when they’re shorter than your shelter. Sometimes, a few small windbreaks work better than one big one.
Using the Leeward Side for Protection
The leeward side, or the area behind an obstacle, has the calmest air. Your tent will feel the least wind pressure here.
Position the back of your tent toward the wind so the narrow end faces incoming gusts. This setup helps your tent shed wind more easily.
Skip the windward side where wind slams into objects. Also avoid setting up right at the base of windbreaks—turbulent air can swirl there.
Test the leeward spot by standing there for a minute. If it feels noticeably calmer, you’ve found a winner. If not, keep looking for better cover.
Step-by-Step Tent Setup in Windy Conditions

Work in stages and secure each part as you go so your tent doesn't turn into a kite. Anchor the windward side first, deploy guy lines with the right tension, and add weight where you need it.
Anchoring the Windward Side First
Figure out which way the wind's blowing. Lay your tent footprint or groundsheet flat and immediately stake down the windward corners with heavy-duty stakes at a 45-degree angle away from the tent.
The first stakes matter most. Use long stakes (at least 9-10 inches) on the windward side to set a solid anchor.
If you’re setting up a tent in windy conditions, go with aluminum or steel stakes—they don't bend as easily as plastic ones.
Point the narrow end of your tent into the wind to cut down on wind-catching surface. Drive stakes deep, leaving just an inch or two above the ground.
Once the windward side's locked down, insert your tent poles while holding the fabric steady. Move quickly but don’t rush—keeping control stops the tent from catching wind before you’re ready.
Deploying Guy Lines and Guy Line Techniques
Guy lines are your best friend when camping in windy conditions. Attach them to every spot your tent offers, not just the corners.
Use a taut-line hitch knot—it’s adjustable, so you can tighten or loosen lines as the wind changes without retying everything. Run each guy line at a 45-degree angle from the tent and stake them 6-8 feet away.
Space guy lines evenly around the tent. If your tent has six points, use all six. More anchors mean better wind distribution and less stress on any one spot.
Add reflective cord or bright markers to your guylines so you don’t trip at night. Keep lines taut, but don’t overtighten—too much tension can damage seams and make new weak spots.
Configuring the Rainfly for Maximum Stability
Attach your rainfly right after you’ve got the tent body secured. The rainfly acts like a protective shell, deflecting wind away from the tent’s main structure.
Pull it tight—don’t leave any loose, flapping sections that’ll catch wind and make noise all night. Secure the rainfly’s corner points first, then move around the perimeter tightening each attachment.
Use the built-in guy line attachment points to add extra stabilization lines. Usually, you’ll find loops along the ridgeline and sides for this.
Proper rainfly tension really matters. If it’s loose, it’ll flap like crazy and might even damage the fly or tent poles.
Adjust the tensioners or buckles until the fabric feels drum-tight, but don’t overstretch it. Make sure the rainfly doesn’t touch the tent body except where it’s supposed to.
Keep a small gap between the fly and the tent walls. That space helps prevent moisture transfer and lets the rainfly shed wind more effectively.
Weighing Down the Tent and Stabilizing Gear
Add extra weight to your tent’s base and vestibule areas with rocks, sandbags, or gear bags. Put heavy stuff—like water containers or packed stuff sacks—along the tent’s perimeter, especially on the side facing the wind.
Try making deadman anchors in soft ground by burying filled stuff sacks about a foot deep, then attaching guy lines to them. This trick works well in sand or loose soil where regular stakes just won’t hold.
| Weight Placement | Purpose | Recommended Weight |
|---|---|---|
| Windward corners | Primary stability | 10-15 lbs each |
| Vestibule areas | Anchor points | 5-10 lbs each |
| Interior corners | Floor tension | 3-5 lbs each |
Store your heaviest gear inside the tent along the edges, not in the center. This keeps the tent’s center of gravity low and adds some resistance to lifting forces.
Keep your equipment organized so it doesn’t shift and mess up your setup if the wind picks up. Check all stakes, guy lines, and weights every few hours—wind conditions change, and what worked at first might not hold up all day.
Safety Tips and Practical Considerations

When wind speeds get above 30-40 mph, camping gets risky. You’ve got to know when it’s just not safe to set up—sometimes, keeping your gear secure and changing your cooking methods is the only way to avoid accidents and keep your camp running.
Recognizing Unsafe Wind Conditions
You really shouldn’t set up a tent when wind speeds go over 30-40 mph. Most tents just aren’t built for those forces.
At those speeds, tent poles snap, stakes pull free, and sometimes the whole tent just blows away. Watch for warning signs like flying debris, breaking branches, dust clouds, or loose objects getting tossed around.
If you’re struggling to stand up or even hold your gear, that’s a clear sign the wind’s too strong. Always check weather forecasts before your trip for high wind warnings or storm advisories.
If you can’t see well or can’t control the tent fabric during setup, it’s time to find better shelter or just wait. No camping trip is worth risking your safety.
Securing Loose Items and Cooking in High Winds
Put all loose items inside your tent or vehicle as soon as you’re done with them. Camp chairs, cookware, and clothes can turn into projectiles if the wind picks up.
Bring a tent repair kit with extra stakes, pole sleeves, and patching material—wind damage happens.
Cooking in high winds takes a little extra care:
- Set up your stove behind a natural windbreak or in your vehicle (but only with good ventilation).
- Don’t ever cook in a closed tent—carbon monoxide is no joke.
- Use a windscreen made for camping stoves to protect the flame.
- Keep fuel canisters secured and away from the cooking area.
Put heavy rocks on top of coolers and storage bins. Tie down anything you can’t move inside, like tarps and rain flies, using extra guy lines and stakes.
Frequently Asked Questions
Setting up a tent in the wind means using good anchoring techniques, picking the right gear, and knowing when things are just too risky. Here are some common questions about securing your tent and picking wind-resistant designs.
What are the steps to secure a tent in high winds?
Start by finding a sheltered spot—look for trees, hills, or rocks that block the wind. Drive your stakes into the ground at a 45-degree angle, leaning away from the tent for better grip.
Make sure every stake is fully in before moving on. Attach all guy lines and pull them tight.
Properly secured guy lines create more anchor points, spreading out the wind’s force. Space the guy lines evenly for balanced support.
Add extra weight with sandbags, rocks, or heavy gear at the tent’s base and guy line anchors. Place these so they won’t slide if the wind picks up. If you’ve got extra stakes, use them for even more stability.
What features should I look for in a tent suitable for windy conditions?
Pick a tent with ripstop fabric—it resists tearing when the wind gets wild. This material has threads woven at right angles to stop rips from spreading.
Look for tents with multiple poles or an adjustable center pole system. These spread out the stress better than single-pole tents.
Check for reinforced seams and tough stitching at all the stress points. Make sure the stake and guy line attachments use durable materials that won’t rip under pressure.
Go for a tent with a lower profile, not a tall, cabin-style one. Lower tents catch less wind and are less likely to get knocked over.
How can I prevent a tent from flapping or making noise in the wind?
Pull the tent fabric as tight as you can during setup. Loose fabric just catches more wind and flaps all night.
Stake down every attachment point—corners, sides, vestibules. Not staking the tent tautly enough is a super common mistake in windy weather.
Make sure your rain fly is clipped and hooked everywhere it should be. A loose fly flaps loudly and could tear or come off in strong gusts.
Check and adjust guy lines as the weather changes. Temperature swings and wind can loosen them, so give everything a once-over now and then.
What is the most aerodynamic tent shape for resisting high winds?
Dome-shaped tents do a great job in the wind. Their curved surfaces let air flow around instead of catching it.
Geodesic tents, with lots of intersecting poles, are even stronger in extreme weather. Their design creates small panels that flex without losing the tent’s shape.
Tunnel tents can work well if you point the narrow end into the wind. That way, there’s less surface area facing the gusts.
Avoid big, vertical-walled cabin tents in wind—they just catch too much air and put more stress on everything.
At what wind speeds should I consider not setting up a tent due to safety concerns?
If winds are steady above 30-35 mph, most tents just aren’t safe. Even with good setup, damage or collapse is likely.
Gusts over 40 mph can turn gear into flying hazards and make keeping a tent upright nearly impossible. Check forecasts before you go—it’s worth it.
Consider the terrain and your tent’s build quality. A solid four-season tent in a sheltered spot can handle more than a cheap summer tent on open ground.
If the wind is already howling when you arrive, it’s probably smarter to sleep in your vehicle or find another shelter. Sometimes, you just have to skip the tent for your own safety.
What methods can I use to protect my tent and its contents from theft while camping?
Lock up your valuables in your car instead of leaving them in your tent. Tents really don't offer any true security—anyone could just unzip or cut through the fabric.
Try using a small cable lock to secure pricey gear like bikes or kayaks to a tree or your vehicle. Sure, it won't stop someone who's determined, but it does make things harder for opportunists.
Stick to established campgrounds that have regular patrols. Other campers and campground hosts naturally keep an eye on things, which really helps keep theft down.
Keep your tent zipped up and your stuff organized. If people walking by can't see what you've got, they're less likely to get curious or tempted.
DISCLAIMER
This document is provided for general information purposes only and should not be relied upon as providing legal advice, technical, or specific operational guidance to the reader, whether as to the practices described in the document or the applicable legal requirements and regulations. Best Camping Deals expressly disclaims any responsibility for liability arising from or related to the use or misuse of any information in this document.