RV Battery Keeps Dying Overnight (What’s Draining It?) — Causes, Quick Checks, and Fixes
You expect your RV battery to wake up ready, not dead. If your battery keeps dying overnight, a hidden parasitic drain, poor charging, or an aging battery usually causes it — and you can find and fix the problem without guessing. Start by checking for devices left on, testing for parasitic draw, and verifying your charger and battery condition so you stop wasting trips and time.
A quick inspection often finds the culprit: interior lights, control modules, or accessories that draw power when the rig is supposed to be sleeping. If nothing obvious shows, measuring the current draw and testing charging behavior will point to a parasitic load, a charger fault, or a battery that no longer holds charge.
Key Takeaways
- Check for hidden loads and devices left on to stop overnight drain.
- Measure draw and test charging to identify parasitic or charger issues.
- Test battery health and plan upgrades or maintenance if capacity is low.
Why Your RV Battery Dies Overnight
Your RV battery can lose most of its charge while you sleep because small loads, poor charging, or battery damage quietly drain power. You’ll usually see steady voltage drops, devices that won’t start, or a battery that won’t hold a charge after a full day of normal use.
Common Symptoms of Overnight Battery Drain
You notice the battery voltage falls several volts from evening to morning. A 12V deep-cycle RV battery that reads 12.6V at night but 11.5V in the morning shows heavy overnight discharge. Lights, the water pump, or the fridge may dim or click when starting.
Look for these signs:
- Battery voltage drop on a multimeter after parking and plugging nothing in.
- Tripped fuses or blown breakers caused by hidden short circuits.
- Interior lights stay on or devices keep drawing power even when switches seem off.
- Battery state of charge never reaches full after charging—charger shows long float or no acceptance.
Record the evening and morning voltages for a few nights. That data points you to parasitic draws, weak cells, or charging failures.
Immediate Signs Your RV Battery Is Failing
If the battery goes dead overnight repeatedly, the battery itself may be failing. You might see slow engine cranking, sulfur smell, or bulging case on a flooded or AGM battery. Batteries older than 3–5 years often lose capacity even if they charge normally.
Test and inspect:
- Perform a load test or use a battery analyzer to read cold cranking amps and capacity.
- Check for sulfation on old lead-acid batteries—a gray crust on plates or reduced charge acceptance.
- Inspect terminals for heavy corrosion and the case for cracks or swelling.
- Note rapid voltage sag under small loads; that indicates internal damage.
Replace a deeply sulfated or swollen battery rather than spending time chasing minor parasitic draws.
Impact on RV Power Systems
A drained house battery affects 12V circuits first. Your water pump, vent fans, and lights may fail. If the chassis battery also drains, you risk not starting the tow vehicle or motorhome.
Consequences include:
- Inverter shutdowns during overnight use, cutting AC power to 120V outlets.
- Battery charger strain as it tries to restore a deeply discharged battery, which can shorten charger life.
- Solar or converter charging mismatch when undercharging or overcharging cycles repeat.
Address the weak battery to prevent repeated stress on the charger and inverter. Fix parasitic loads to stop overnight drain and protect both house and chassis batteries. For help diagnosing hidden drains, consult guides like the one explaining common RV battery failures and fixes at RV battery troubleshooting. (https://thecampingnerd.com/why-does-my-rv-battery-keep-dying/)
Understanding Parasitic Drains
Parasitic drains are hidden power draws that keep your RV battery losing charge when the rig is off. You need to find which devices pull current, how much they pull, and whether a battery disconnect switch, battery monitor, or a multimeter can help you catch them.
What Are Parasitic Loads?
Parasitic loads are electrical devices or circuits that draw current with the ignition and main systems off. They include items designed to stay powered, like clocks and alarm modules, and unintended draws from faulty wiring or stuck relays. Typical draws range from a few milliamps for memory circuits to hundreds of milliamps for accessories left in standby.
Measure parasitic loads with a multimeter set to amperes. Put the meter in series between the negative battery terminal and the battery cable after everything is off and doors are closed. If the draw exceeds about 50–100 mA for long-term storage, you risk running the battery flat over several nights.
Use a battery monitor to track state of charge and voltage trends. A battery disconnect switch gives a simple way to stop all house loads when you store the RV, but it also cuts any needed circuits like pumps or alarms unless you wire them separately.
Typical Sources of Parasitic Power Loss
Common culprits include interior lights left on, propane detectors, stereo memory, and control boards for slide-outs and furnaces. DC converters and inverter control circuits can leak current even when the shore power appears connected. Some modern appliances keep standby modes that draw 0.1–1 amp continuously.
Faulty components also cause drains: shorted wiring, corroded connectors, and failing relays or solenoids that never fully open. Solar charge controllers with wiring faults or chargers with bad diodes can backfeed power as well. Look for devices that are new or recently serviced; those changes often start unexpected drains.
Check fuses and disconnect individual circuits by pulling fuses or using the multimeter to isolate the circuit drawing current. Mark any repeat offenders and consider adding a dedicated switch for high-draw accessories or using the battery disconnect switch during long storage.
How Parasitic Drains Affect Battery Life
Small constant drains reduce usable amp-hours and push the battery into deeper discharge cycles. Repeated deep discharges shorten battery life, especially for lead-acid batteries that suffer sulfation when left undercharged. Even lithium batteries lose usable range if they sit at low state of charge for long periods.
When a parasitic drain runs the battery down overnight, you may find reduced starting power and poorer performance from inverters and lights the next day. A battery monitor helps you monitor depth of discharge and detect trends before the battery fails. If you cannot locate the drain quickly, install a battery disconnect switch or use a trickle charger on a smart float mode to keep the battery above critical voltage.
Power Consumption and User Errors
You can usually trace overnight battery drain to a few clear mistakes: leaving appliances on and running high-draw devices while parked. Fixing those cuts most overnight losses quickly.
Accidentally Left-On Appliances
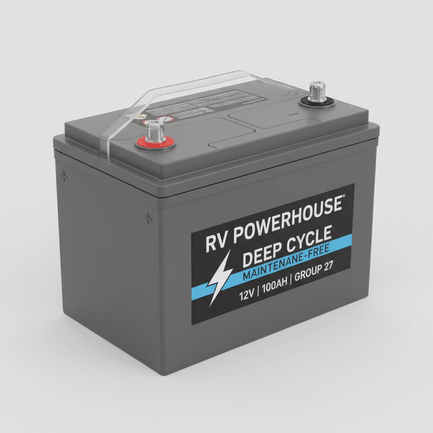
Small lights, chargers, and exhaust fans draw steady current. A single 12V LED light uses 0.5–2 amps; left on for 10 hours that can eat 5–20 amp-hours from your battery. Compare that to a typical 100 Ah battery—losing 20 Ah overnight uses a fifth of usable capacity.
Check the common culprits before bed:
- Interior lights and accent LEDs.
- Phone and laptop chargers that stay plugged in.
- Vent fans, water pumps, and electric steps that may not fully retract.
Use a quick checklist: turn off all lights, unplug nonessential chargers, and confirm fans and pumps cycle off. A battery disconnect switch or shore-power smart outlet prevents those accidental draws when you’re not using shore power.
Energy-Hungry Devices Overnight
Some gear draws much more power and will drain your battery fast if left running. A 12V refrigerator on DC, for example, can average 2–4 amps while running and spike higher on compressor start, taking 20–50 amp-hours over a 10–12 hour night depending on duty cycle. Space heaters, inverters powering AC loads, and microwaves are even worse—an inverter running a 500W load draws about 42 amps from a 12V battery.
Monitor these items:
- 12V fridges on battery power.
- Inverters powering AC devices.
- Portable heaters, dehumidifiers, and high-draw pumps.
Measure draw with a multimeter or inline amp meter to see precise amp-hours used overnight. If your battery capacity is rated at 100 Ah, plan to use no more than 50% for long life—so limit overnight loads to about 40–50 amp-hours or add solar/shore charging to cover heavier use.
RV Battery Charging Issues
Charging faults are a common cause of a battery that dies overnight. Check the device that charges the house battery, confirm the charging profile, and verify the actual voltage at the battery terminals.
Problems With the RV Converter
A faulty or undersized RV converter can undercharge your house battery bank. If the converter’s output voltage stays below about 13.2–13.6 volts for a 12V lead-acid battery, the battery won’t reach a full state of charge. That leaves it low overnight and more prone to sulfation.
Look for these signs: dim interior lights on shore power, converter fan running constantly, or battery voltage that rises briefly then falls once the converter cycles off. Test at the battery posts with a multimeter while the converter runs. Compare the reading to the converter’s rated output on its label.
Also check for wiring and fuse issues between the converter and battery. Corroded terminals, thin gauge wires, or a bad connection at the converter can drop voltage enough to stop proper charging. If you have a smart charger or MPPT solar charger feeding the same bank, confirm that all chargers use compatible charge stages, or use an automatic charge combiner to avoid conflicts.
Inadequate Charging From Shore Power or Generator
Shore power or a generator that can’t supply steady voltage will undercharge your battery. Many shore power pedestal outlets drop under load, and older generators often run at lower voltage when the engine load changes. If voltage into the converter or charger stays below 120–125 VAC under load, the charger may not put out full DC voltage.
Measure AC voltage at the inlet while running appliances and while the converter or onboard charger is charging. If it sags, try a different pedestal, a boost transformer, or a larger generator. Modern smart chargers need stable AC to complete absorption and float stages; without those stages the battery only gets a surface charge and fades quickly.
Also confirm your shore power-to-battery wiring and transfer switch are correct. A poor transfer or double-conversion setup can add losses. If you rely on solar panels, verify the MPPT charge controller is set for the battery type, and that the panel output is enough to meet daily draw plus recharge needs.
Surface Charge vs True Charge
A surface charge looks like a full battery but fades fast because the battery never completed absorption or equalization. You’ll see a high voltage right after charging—often 12.8–13.6V for a short time—but the current hasn’t penetrated the plates.
To tell the difference, measure voltage after the battery rests for one hour with no load or after a small load is applied. If voltage drops significantly, that was only a surface charge. Use a charger or converter that offers a proper multi-stage profile: bulk, absorption, and float. Smart chargers and MPPT controllers typically handle this well when configured for lead-acid or AGM chemistry.
If you repeatedly get only surface charges, consider running an equalization (for flooded lead-acid) or using a desulfation-capable charger. That helps recover lost capacity and prevents the battery from dying overnight.
Overcharging, Undercharging, and Battery Maintenance
You should watch charging closely and keep a regular maintenance routine. Small charging errors add up fast and can cut battery life or leave you with a dead battery in the morning.
Consequences of Overcharging
Overcharging raises battery voltage and temperature, which damage the plates and electrolyte. In lead-acid batteries this speeds corrosion and causes water loss, so you must top up distilled water on flooded cells when voltage and temperature indicate it. Overcharge also creates gassing; that wastes capacity and can warp plates.
For sealed AGM or lithium batteries, overcharging can trigger internal protection or the battery management system (BMS). A BMS will cut charge to protect cells, but repeated overcharge events shorten overall life and may require replacement sooner. Use a smart multi‑stage charger set to the correct chemistry and float voltage to avoid this.
Signs of overcharging: bulging case, high resting voltage after charging, warm battery, or frequent need to add water. If you see any, stop charging, test voltage with a meter, and inspect for damage.
Risks of Undercharging
Undercharging leaves sulfate crystals on lead plates in flooded or AGM batteries, a process called sulfation. Sulfation reduces capacity and raises internal resistance. If you repeatedly run your battery below 50% state of charge or float it too low, you speed this process and effectively shorten battery life.
Undercharging from a weak alternator or an undersized charger is common. If you drive and the alternator never reaches a proper bulk charge, or if shore power chargers are set to a low voltage, the battery never hits full charge. Use a charger or DC‑to‑DC converter that provides a proper bulk and absorption stage for your battery type.
Detect undercharging by measuring resting voltage (below ~12.4V for lead‑acid after rest) and recording shallow cycles. If sulfation begins, a controlled equalization charge for flooded lead‑acid batteries or an appropriate lithium-ion charging profile may help, but some damage may be permanent.
Regular RV Battery Maintenance Practices
Adopt a weekly or monthly check routine depending on use. Inspect terminals for corrosion, tighten clamps, and clean with a baking‑soda solution if needed. Apply a thin coat of dielectric grease to prevent future corrosion.
Use a multistage smart charger sized to your battery bank and set for the correct chemistry. For vehicles, a DC‑to‑DC charger or proper isolator ensures the alternator delivers a full charge while driving. Check resting voltage and specific gravity (flooded cells) to gauge health.
Avoid deep discharge below the battery’s recommended depth of discharge; lead‑acid should not be routinely drained below 50%. Store RV batteries charged at about 50–70% for long periods and recharge every 1–3 months. For detailed charging settings and tips, see guidance on RV battery maintenance.
Assessing RV Battery Health and Aging
Check voltage at rest, watch for slow recovery after charging, and look for physical signs like swelling or corrosion. A proper test includes a resting voltage check, a load or conductance test, and monitoring patterns over days with a battery monitoring system.
How to Test Battery Voltage
Start with a fully charged battery. Turn off all loads and let the battery sit 4–6 hours (or overnight) to reach resting voltage. Use a digital multimeter to measure the voltage across the battery terminals.
Compare readings to these quick guides:
- 12.7–12.8 V: fully charged (healthy).
- 12.4–12.6 V: ~75–90% charge.
- 12.0–12.2 V: ~25–50% charge.
- <12.0 V: deeply discharged; possible damage.
Also check after a short, known load (like headlights for 30 seconds). If voltage falls sharply under load and does not recover quickly, the internal capacity has dropped. For lead-acid, a proper load test or conductance test by a shop gives better results than voltage alone. If you use a battery monitoring system (BMS or shunt-based monitor), compare its state-of-charge reading with your meter to spot calibration or aging errors.
Identifying When Replacement Is Needed
Replace the battery when tests show consistent low capacity, repeated deep discharges, or failure to accept charge. If a battery fails a load or conductance test, holds less than 50% of rated capacity, or shows rapid voltage drop under load, plan to replace it.
Look for these practical signs:
- Battery won’t hold charge between uses despite proper charging.
- BMS reports declining amp-hours available over several charge cycles.
- Repeated need to boost or jump-start overnight.
Age matters: most flooded or AGM house batteries show significant decline after 3–6 years. If you rely on your RV off-grid, replace earlier rather than later to avoid getting stranded.
Signs of Sulfation and Capacity Loss
Sulfation shows up as longer charge times, reduced acceptance of charge, and higher resting voltage under partial charge. You might see white, powdery crystals on lead posts or an internal hardening that a charger cannot reverse.
Test clues:
- Charger reports long equalization times or high voltage but low amp flow.
- Battery takes surface charge quickly but drops voltage after a short rest.
- Conductance or load tests show lower-than-rated Ah capacity.
Some desulfation chargers or controlled equalization can help early-stage sulfation, but they rarely restore deeply sulfated batteries. If your BMS flags repeated low capacity or the battery shows physical deterioration, treat sulfation as a sign that replacement is likely needed.
Upgrades, Prevention, and Long-Term Solutions
You can stop overnight drains and cut maintenance by choosing the right battery type, adding monitoring and disconnects, and following storage and preservation routines. Each change targets a specific cause: chemistry, parasitic draw, or poor storage.
Switching to Lithium Batteries
Switching to lithium batteries gives you higher usable capacity and faster charging. A 100 Ah lithium battery typically delivers 90–95 Ah usable versus 50–60 Ah from a similar lead-acid, so you get more runtime and fewer deep cycles.
Lithium tolerates partial state-of-charge better and resists sulfation. That reduces the chance your battery will show a low reading after a night of small parasitic draws. Expect built-in battery management systems (BMS) to protect against overcharge, overdischarge, and high cell temperatures.
Installation notes: check your RV charger and converter compatibility, or add a DC-to-DC charger or lithium-capable converter. You may also need different mounting and fusing; lithium is lighter but can deliver high current, so size wire and fuses properly. Budget for higher upfront cost but longer cycle life and less maintenance.
Benefits of Battery Monitors and Disconnects
A battery monitor displays the real-time state of charge, current (A), and battery health trends. You can spot a parasitic draw quickly by watching amps during sleep. Pick a monitor that reports amp-hours used, state-of-charge percent, and has a programmable shunt.
A battery disconnect switch cuts all loads when you’ll store the RV. Use a keyed or lever switch for daily use, or an automatic low-voltage disconnect to protect the battery. Combine a disconnect with the monitor: log a baseline at sleep and flip the switch to confirm the drain disappears.
Practical setup: mount the shunt at the battery negative, wire the monitor display near your dash, and place the disconnect where you’ll reach it before storage. These tools reduce guesswork and prevent slow drains that kill batteries overnight.
Best Practices for Storing and Preserving Batteries
Store RV batteries charged to 75–90% for long life; avoid leaving them fully discharged. For lead-acid, float charge monthly and equalize if recommended. For lithium, store near 50–80% if you’ll sit for months, and avoid freezing temps without insulation.
Keep batteries clean and terminals tight. Corrosion raises resistance and causes poor charging. Use dielectric grease on terminals and check specific gravity on flooded cells if applicable.
Set a maintenance schedule: check voltage and specific gravity (lead-acid) or BMS logs (lithium) every 2–4 weeks. If you store the RV, use a battery maintainer or solar trickle charger sized to replace typical parasitic loads. Proper storage and small routine checks prevent overnight deaths and extend battery life.
Frequently Asked Questions
This section explains why batteries drain, how to test for drains, steps to stop overnight loss, expected runtime when boondocking, and whether hardware like a disconnect switch helps. You’ll get clear, practical steps and checklists so you can find and fix the problem.
Why does my RV battery drain even when plugged into shore power?
Your converter or onboard charger may not be charging the battery correctly. Faulty converters, poor AC input, or a bad ground can prevent charging even when shore power is present.
Parasitic loads also draw power while plugged in. Devices like CO/LP detectors, displays, or refrigerators on standby can keep pulling current if the converter isn’t maintaining the battery.
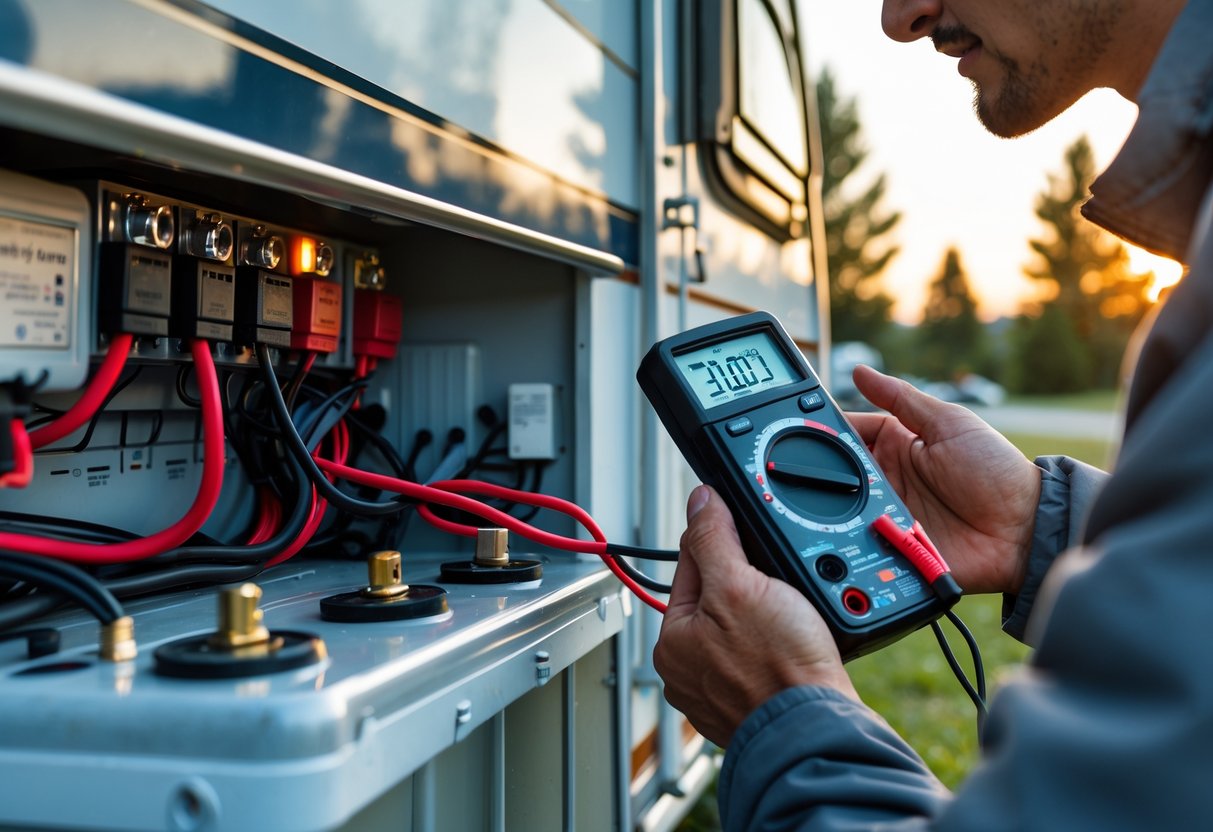
Check the charging voltage at the battery terminals with a multimeter; a healthy charging system reads about 13.6–14.6 V. If voltage is low, inspect the converter, shore cord, and AC breakers.
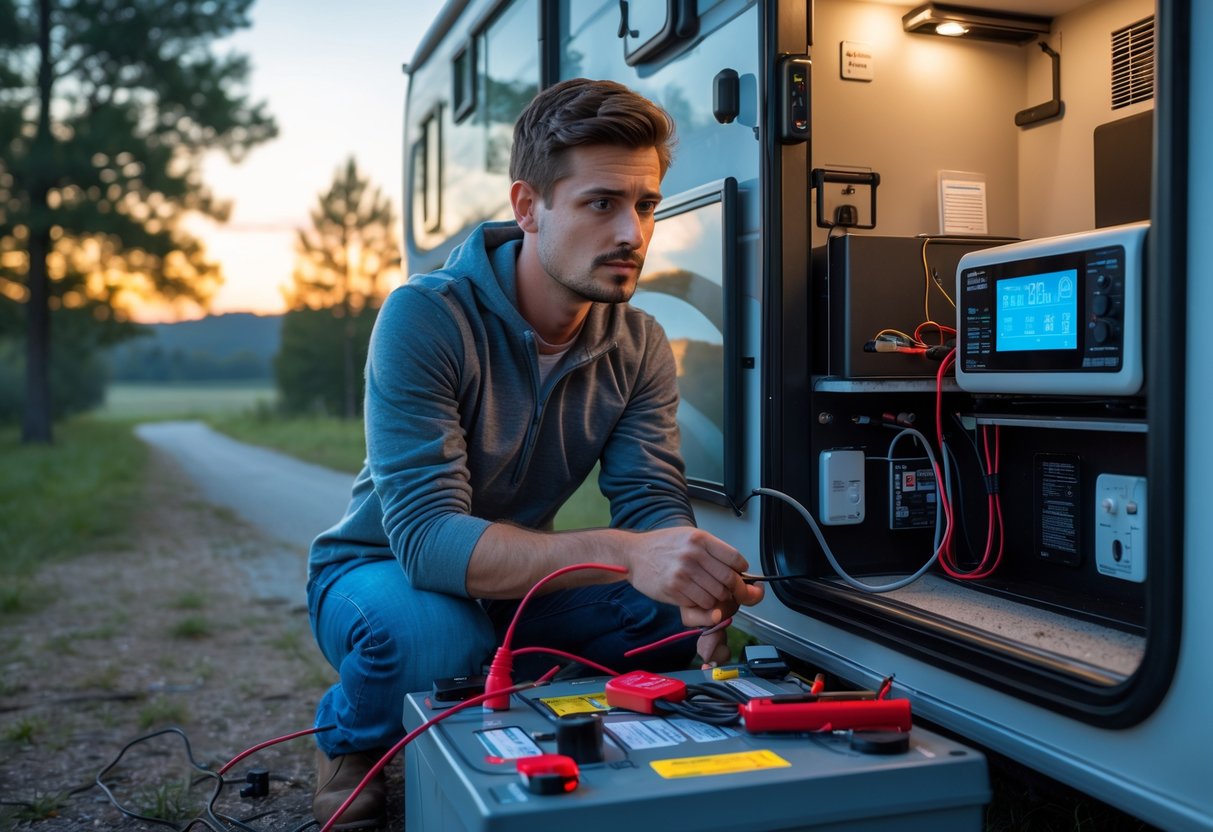
How can I perform a battery drain test on my RV to identify the issue?
Start with the battery fully charged and record the resting voltage. Disconnect all DC loads and monitor voltage over several hours to confirm the battery holds a charge when isolated.
Next, reconnect circuits one at a time or pull fuses/turn off breakers to find the circuit drawing current. Use a digital multimeter set to amps in series with the negative battery cable to measure parasitic draw directly.
If you find a draw above about 50–100 mA with everything off, isolate circuits until the draw drops and inspect devices on that circuit. Test suspected devices separately if needed.
What strategies can I use to prevent my RV battery from draining overnight?
Turn off or disconnect nonessential devices like inverter, fridge control board, and interior electronics when parked. Pull fuses for circuits you don’t need overnight.
Install an automatic low-voltage disconnect or set a battery monitor alarm to protect against deep discharge. Maintain charging health by using a smart charger, solar charge controller, or ensuring the converter output is correct.
Regularly clean and tighten battery terminals and check fluid levels on flooded batteries. Replace old batteries that fail to hold a charge after proper testing.
How long should an RV battery typically last while boondocking before recharging?
Runtime depends on battery capacity (amp-hours) and your average load. For example, a 200 Ah usable battery bank at a 50% depth of discharge gives about 100 Ah usable.
If your overnight load is 10 amps, that 100 Ah would last about 10 hours. Track actual amp draw with a battery monitor to estimate real-world runtime for your setup.
Can a battery disconnect switch help prevent my RV battery from dying overnight?
Yes. A battery disconnect switch lets you cut all DC power when the RV is parked, eliminating parasitic draws from most circuits.
Remember that some devices, such as alarms or propane detectors, may require power to remain functional; consult local laws and safety requirements before disconnecting power completely.
What common electrical items might be draining my RV battery when it's not being actively used?
CO and propane detectors, control board displays, and digital thermostats often draw small but continuous current. Those small draws add up over time.
Other suspects include inverter standby current, water pump relays, weak fridge control boards, and LED accent lights. Inspect these items and measure the current to determine which ones are causing the drain.
Find more troubleshooting tips on diagnosing and fixing parasitic draws from an RV battery in this practical guide to what drains an RV battery when not in use.
DISCLAIMER
This document is provided for general information purposes only and should not be relied upon as providing legal advice, technical, or specific operational guidance to the reader, whether as to the practices described in the document or the applicable legal requirements and regulations. bestcampingdeals.com expressly disclaims any responsibility for liability arising from or related to the use or misuse of any information in this document.